
In our new drawing guide, I will tell you how to draw a Tesla Model 3. It is a very beautiful and popular car, so we decided to break down drawing it into steps.

How to Draw a Tesla Model 3: Introduction
Today’s lesson will focus on one of the most exciting innovations in the automotive world – the Tesla Model 3. This car is not only the pinnacle of technical excellence but also embodies aesthetics and elegance. So, we will dive into the world of unique design and the power of electric vehicle technology and try to capture its beauty and innovative spirit in our drawing.
Tesla Model 3 is the epitome of elegance and speed. Its sleek lines and simple shapes give it a unique look. But behind this visual appeal lies deep technical insight and clever solutions that make it one of the most advanced cars in the world. And, that’s why we decided to create a lesson on how to draw a Tesla Model 3.
Today we will be exploring every detail of this machine, diving into its shape and textures to bring it to paper with our own artistic interpretation. We will learn to convey the dynamics and energy of this car through our drawings.
Tesla Model 3 Drawing Tutorial
Time needed: 1 hour
How to Draw a Tesla Model 3
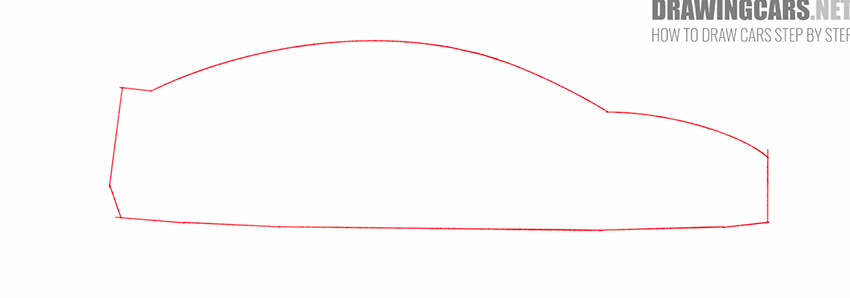
- Sketch the basic outline of the Tesla Model 3.
For this step, you can sketch out the main outline of the car slightly casually, using straight and slightly curved lines.
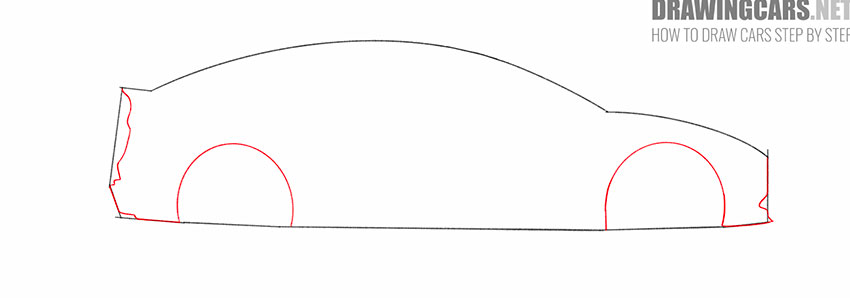
- Add the front and back of the Tesla Model 3 and add the arches.
Near the side lines of the previously applied markup, draw curved lines of various lengths, and also add arcs at the bottom of the intended outline of the car.
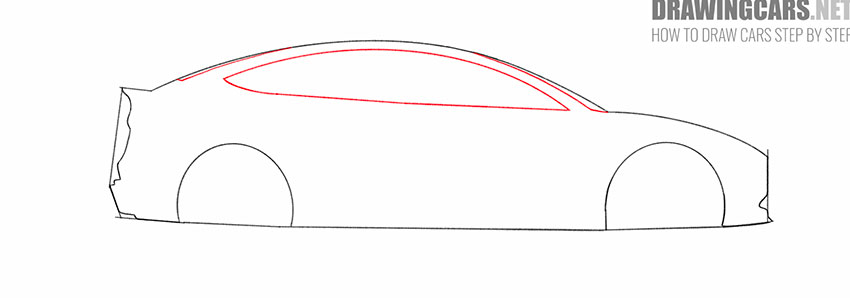
- Depict the windows of the car.
Draw the visible part of the front and rear windows using straight lines. With the help of smooth lines draw an elongated side window, the front of which is an acute angle.
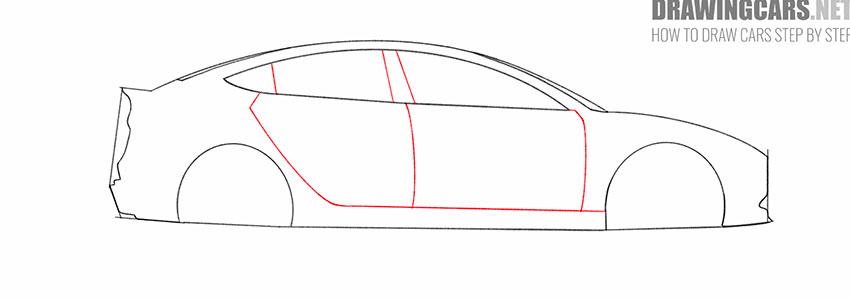
- Draw the doors and detail the windows.
Using straight and smooth curved lines, draw the outline of the front and back doors. Draw straight lines inside the outline of the side window.
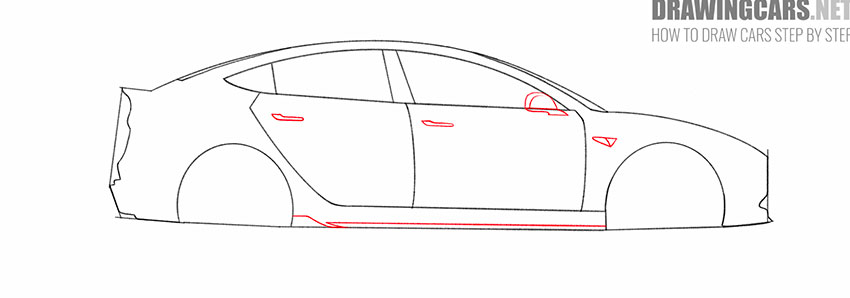
- Add the side mirror, parking lights, door handles and other elements of the car.
Now you should use straight lines, arcs, triangles as well as curved lines to add some elements of the car.
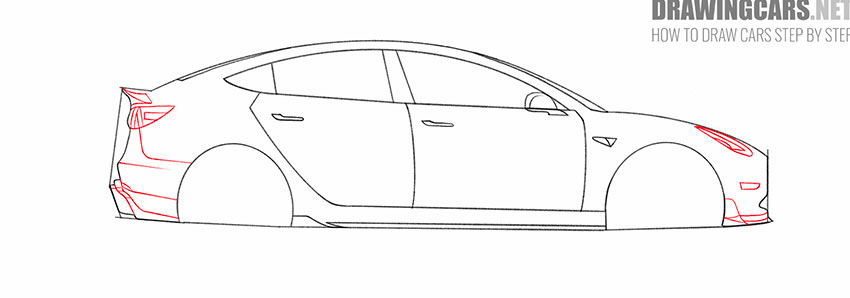
- Draw the headlights and other elements to the front and back of the Tesla Model 3.
On the right and left sides, inside the outline of the car you drew earlier, add straight and curved lines of varying lengths, as shown.
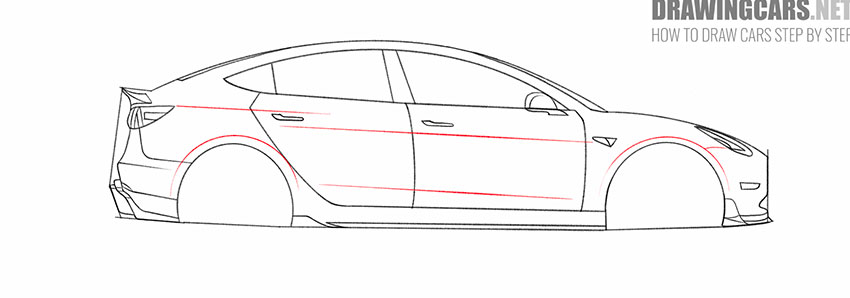
- Depict the bumps on the side of the Tesla Model 3.
Now you should draw straight thin lines of different lengths on the side of the car, one small curved line, and also add arcs over the previously drawn car arches.
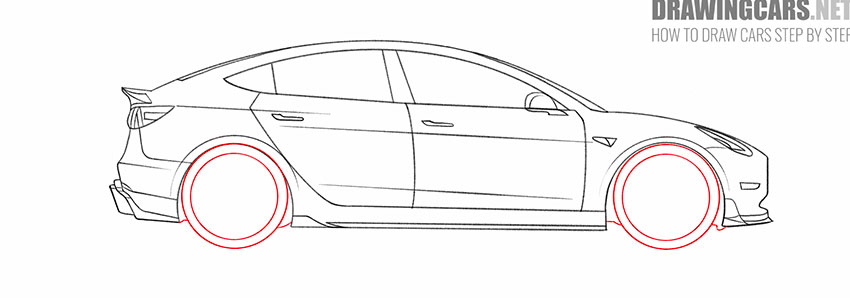
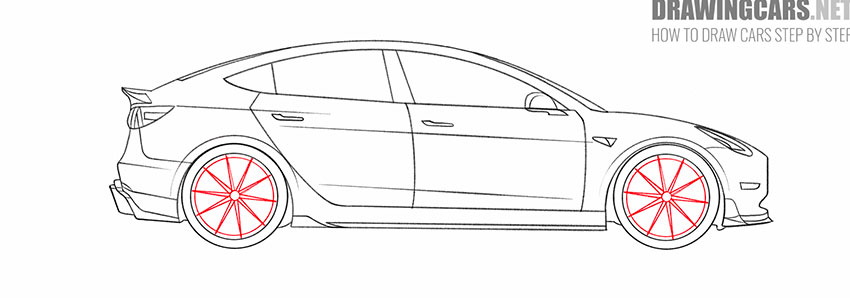
- Add the car wheels and erase extra lines.
Draw two symmetrical wheels using circles of different diameters, add short lines around them, and also remove unnecessary lines with the eraser.
- Finish drawing the Tesla Model 3 wheels.
Inside the previously drawn circles, add more circles of different diameters, as well as many straight lines of the same length.
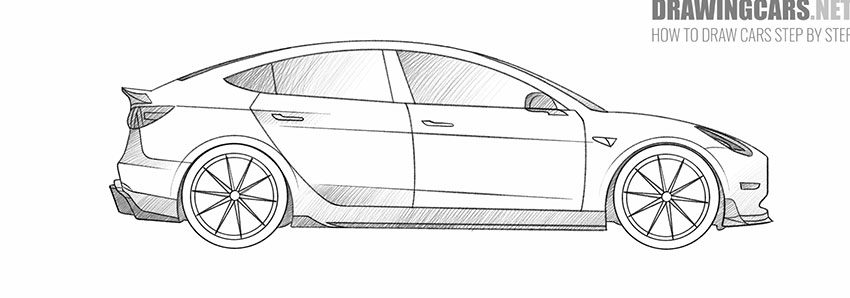
- Make the finished drawing more realistic.
Now you can apply hatching of different density to the drawing to indicate dark areas and make your drawing more realistic and voluminous.


Conclusion
This is the end of this simple drawing lesson, with the help of which you learned how to draw a Tesla Model 3 step by step. We also recommend that you look at other drawing lessons on our website, with the help of which you will learn how to draw various drawings of an automotive theme, as well as practice drawing various geometric shapes.
Tesla Model 3 is not just a car, it is a work of art and engineering. We hope that this tutorial not only improved your artistic skills, but also inspired you to new creative endeavors. Remember that art is a way to express your feelings and thoughts, and each of your drawings is unique, as it is directly related to your inner world.
Also, we hope that you not only enjoyed this tutorial, but also learned something new about how you can see beauty in the details. Keep creating, and remember that your creativity matters. Thank you for your participation, and we look forward to your comments.
Leave a Reply