
This drawing simple but realistic drawing lesson will show you how to draw a semi-truck. There are a lot of details in this drawing, but we tried to make it comfortable, logical and convenient.

How to Draw a Semi-Truck: Introduction
Today’s drawing lesson will be dedicated to the exciting world of transport and creativity – we will study and draw a semi-truck, this mighty giant of the road that transports goods and connects our cities and countries. Semi-trucks are not just vehicles, they are a symbol of power, reliability and forward movement. These thoughts inspired us quite a lot when we did this lesson on how to draw a semi-truck.
Today we will dive into the details of this unique mode of transport. We will consider its shape, textures and proportions so that our drawings convey all its strength and majesty. This lesson will give you the opportunity to not only improve your drawing skills, but also to see the beauty in the simple, everyday things around us.
Semi-trucks are an important part of our global economy and logistics, and today we will have the opportunity to contribute to their representation through art. Let’s start our creative journey and see how we can make this powerful vehicle a part of our artwork.
Are you ready to venture into this exciting world of drawing?
Semi-Truck Drawing Tutorial
Time needed: 1 hour
How to Draw a Semi-Truck
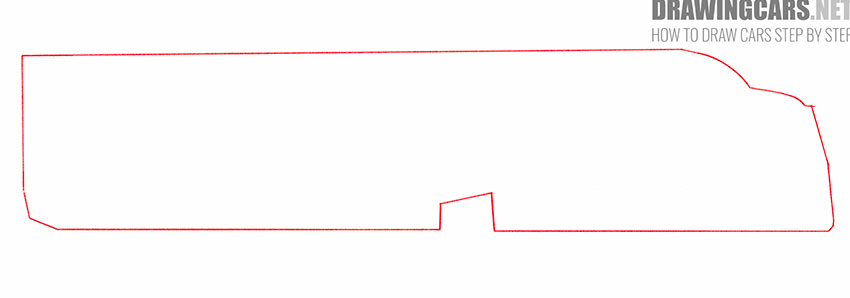
- Outline the Semi-Truck.
First, you need to lay out the markings to indicate the location and dimensions of the Semi-Truck. To do this, use straight and curved lines of different lengths.
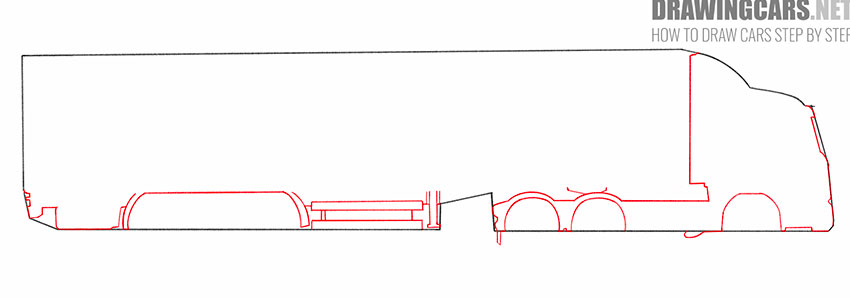
- Refine the contour of the front and rear of the Semi-Truck, add arches and other elements.
In the front and back of the truck, add straight and curved lines, draw some arcs, curved and straight lines, at the bottom of the truck.
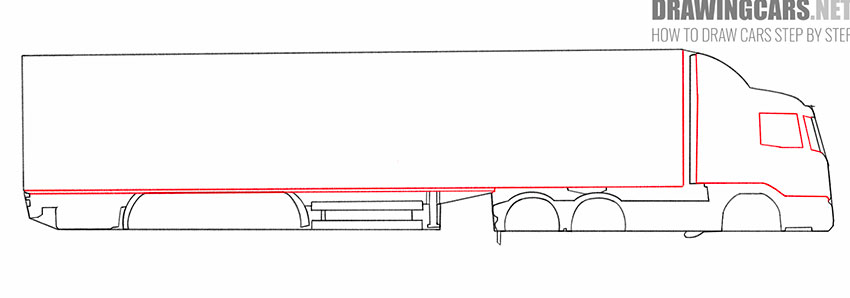
- Add the outlines of the body and driver’s cab.
Use straight lines of varying lengths to outline the cabin and indicate the location of the windows on it. With the help of horizontal and vertical lines draw the bottom and sides of the body.
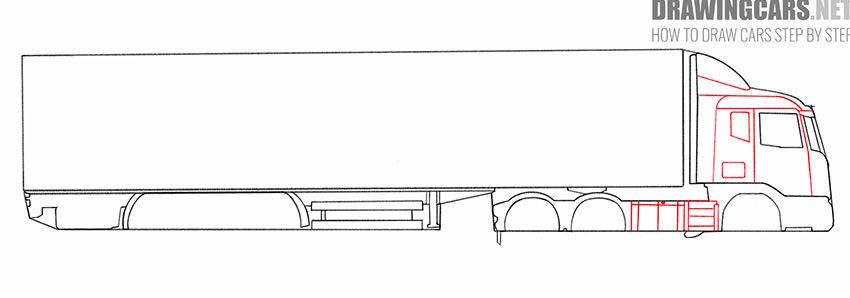
- Continue drawing the driver’s cab and the elements at the bottom of the Semi-Truck.
Next to the previously drawn windows of the driver’s cabin, add another window, as well as a few elements using straight and curved lines. Add straight lines at the bottom of the cab and body.
- Finish drawing the arches, add some elements to the bottom and front of the car.
Next to the previously drawn arches, add a few more curved lines, draw a rectangle, as well as straight lines of different lengths.
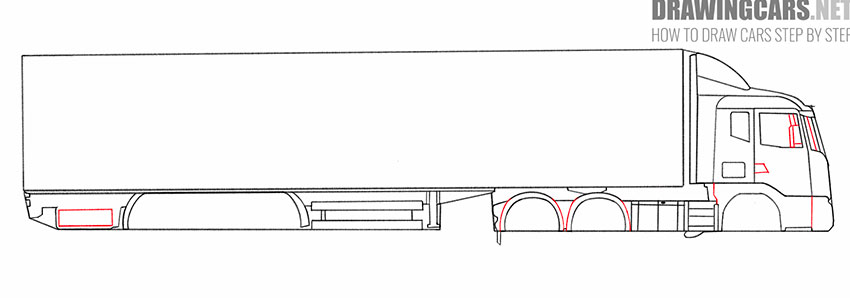
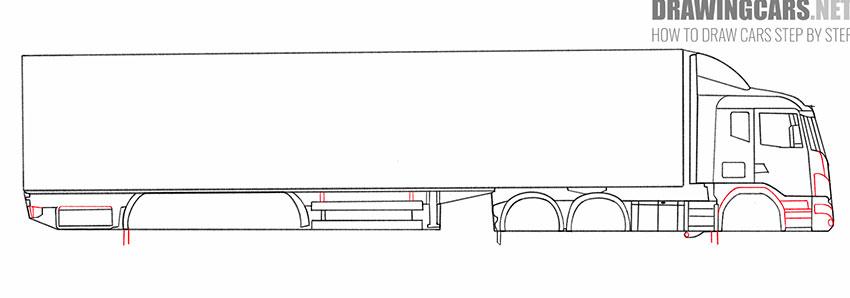
- Add some elements to the bottom of the Semi-Truck.
Use straight lines of varying lengths as well as arcs to add some elements to the front and back bottoms of the Semi-Truck as shown.
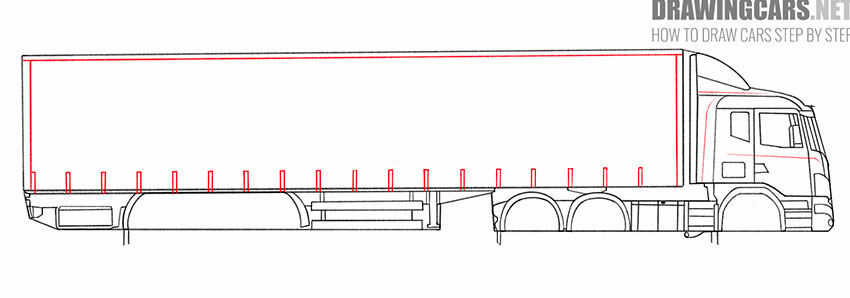
- Draw the driver’s cabin convex, and also complete the drawing of the body.
Depict some straight lines with rounded ends on the previously drawn driver’s cabin, and add straight lines of different lengths on the body.
- Depict the wheels of the car and remove the extra lines.
At the bottom of the Semi-Truck you have drawn, add circles of different diameters, as well as arcs around them. Remove extra lines from the drawing with the eraser.
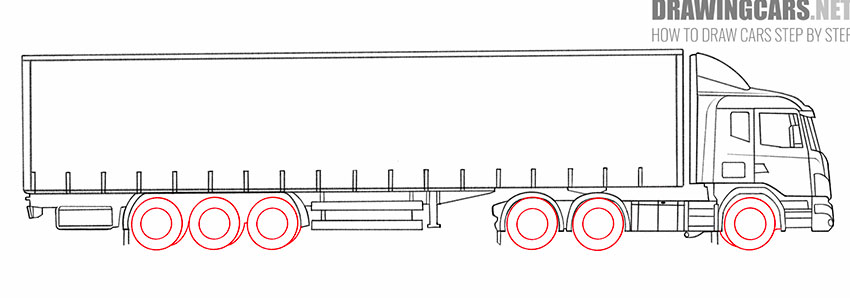
- Finish drawing the wheels of the Semi-Truck.
Inside each of the previously drawn wheels, add a few more circles of different diameters, as shown in the picture.
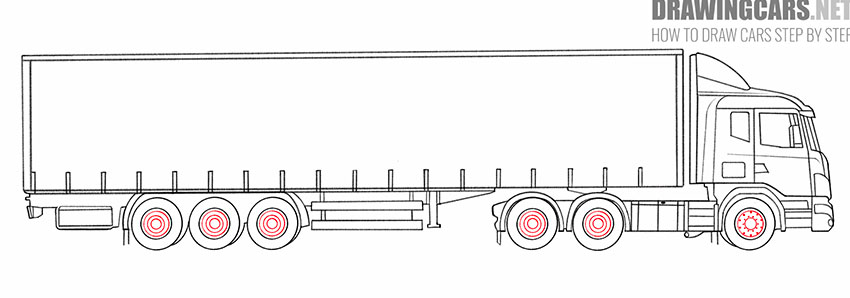
- Finish drawing the Semi-Truck.
Now you can apply hatching of different density to your drawing to indicate dark areas and make the drawing more realistic and voluminous.


Conclusion
This is the end of this simple drawing lesson, with the help of which you learned how to draw a Semi-Truck step by step. We also recommend other drawing guides on our website, with the help of which you will learn how to draw various drawings of an automotive theme and various geometric shapes.
So, thanks for taking part in our semi-truck drawing tutorial! Your creativity and attention to detail made this lesson special. Remember that art is not only a way to express yourself, but also an opportunity to see beauty in everyday things. Keep painting with love and passion. Good luck in your future artistic adventures!
Leave a Reply