
This is a simple and clear instruction on how to draw a Tesla Roadster step by step.

How to Draw a Tesla Roadster: Introduction
Welcome to a drawing lesson dedicated to one of the most exciting and innovative cars of our time – the Tesla Roadster. Tesla Roadster is not just a car, it is a symbol of advanced technology, speed and style. Throughout this tutorial, we’ll delve into the elegant lines and stunning styling of this electric sports car. That is why we created this guid about how to draw a Tesla Roadster for so long and carefully.
During this lesson you will learn how to capture every detail of this unique car on paper. We’ll take a look at its stunning profile, explore the harmony of shapes, and learn techniques for creating realistic shadows and light and shade. Immersing yourself in drawing a Tesla Roadster will not only develop your artistic skills, but also allow you to feel inspired by the fusion of innovation and art.
Prepare yourself for an exciting journey into the world of automotive design and create your own unique interpretation of this electric marvel. Get your pencils, paper, and imagination ready. Let’s start drawing Tesla Roadster!
Tesla Roadster Drawing Tutorial
Time needed: 1 hour
How to Draw a Tesla Roadster Step by Step
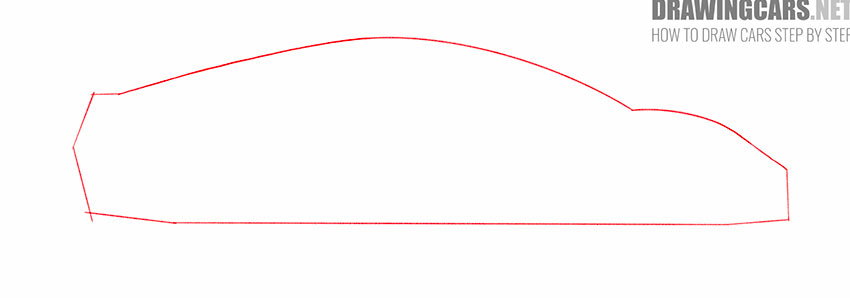
- Draw the main outline of the Tesla Roadster.
With the help of straight and curved lines depict the outer contour of the car. The bottom part looks flat, the sides are made up of straight lines, and the top part is convex.
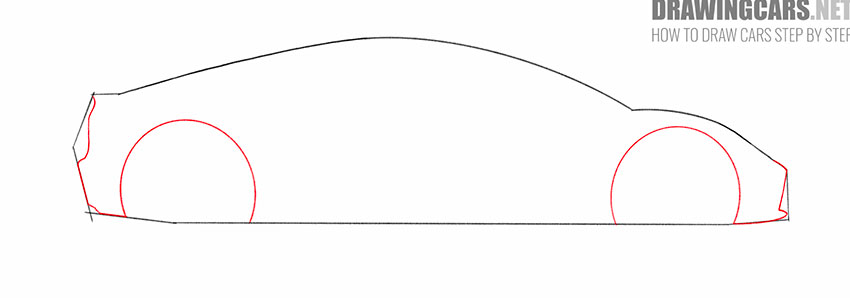
- Give the car the desired shape.
With the help of several broken lines draw the outline of the front and rear of the car. Draw two wheel arches with semicircular lines.
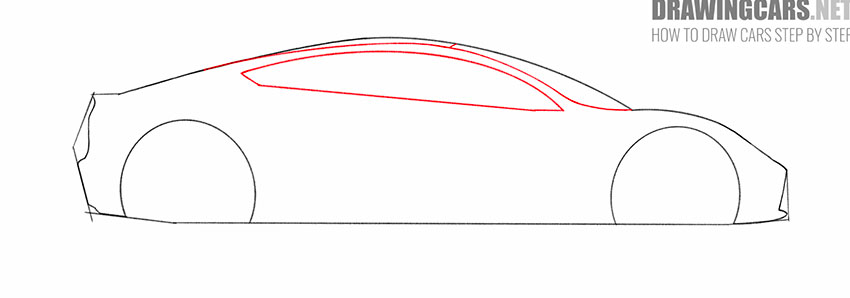
- Add outlines for the windows of the Tesla Roadster.
At the top of the shape you have drawn, draw a few straight and curved lines of varying lengths, as shown, add a short line at the top of the car.
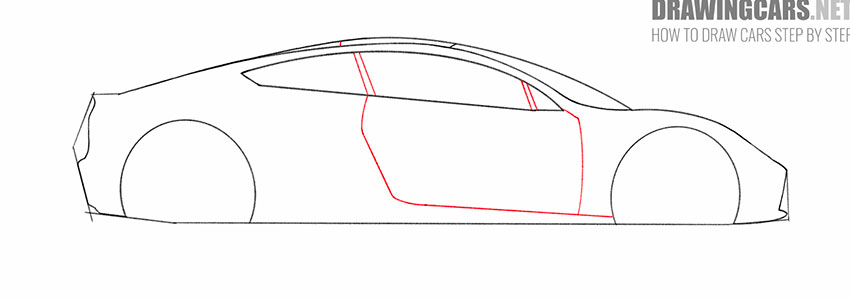
- Depict the door and detail the window.
With the help of several straight curved lines draw the door and draw straight cross lines on the side window to divide it into sections.
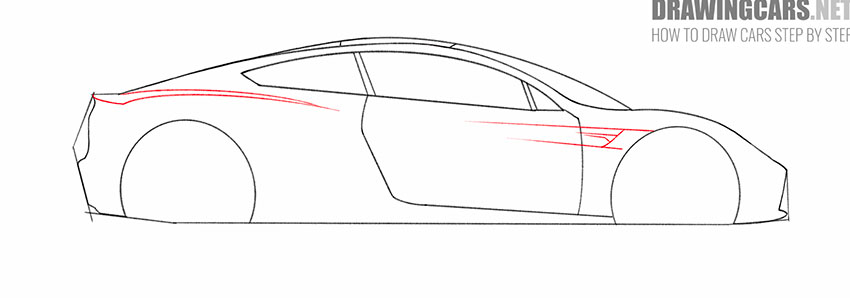
- Sketch out the raised spots on the surface of the car.
Draw some thin, straight lines, as well as some slightly curved lines, on the surface of the Tesla Roadster to make the drawing look more three-dimensional.
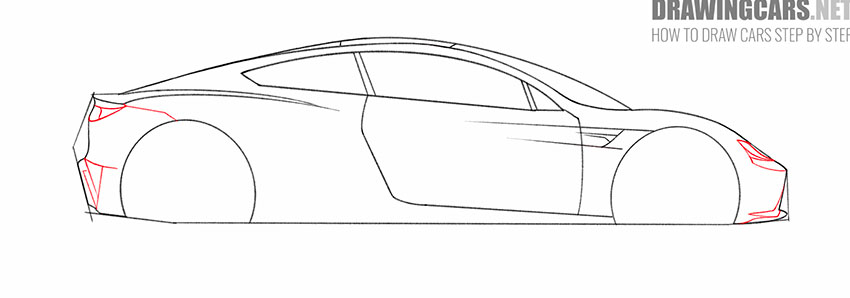
- Add the headlights and other elements to the front and back of the Tesla Roadster.
On the right and left sides of the outline of the car you drew earlier, add arcs, straight lines, and curved lines of varying lengths.
- Depict the bump lines to the surface of the Tesla Roadster and add the footboard.
Draw many thin straight lines and slightly curved lines, as well as two large arcs on the surface of the machine, as shown in the figure.

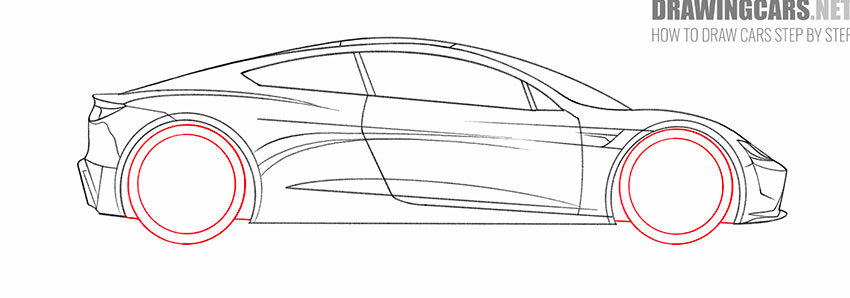
- Sketch out the car wheels and erase extra lines.
Depict two symmetrical wheels using circles of different diameters, add short lines around them, and also remove unnecessary auxiliary lines with the eraser.
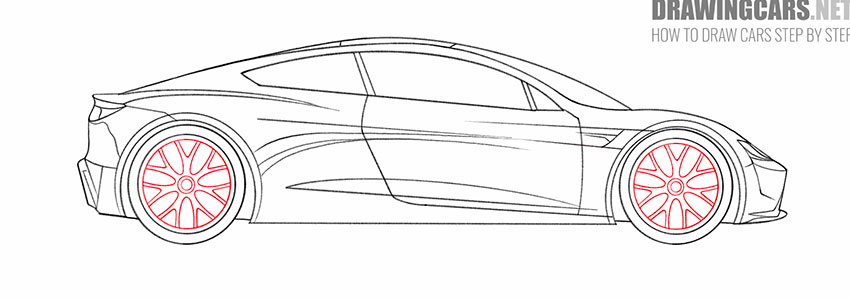
- Finish drawing the wheels of the Tesla Roadster.
Inside the previously drawn circles, add more circles of different diameters, as well as many curved lines of different lengths.
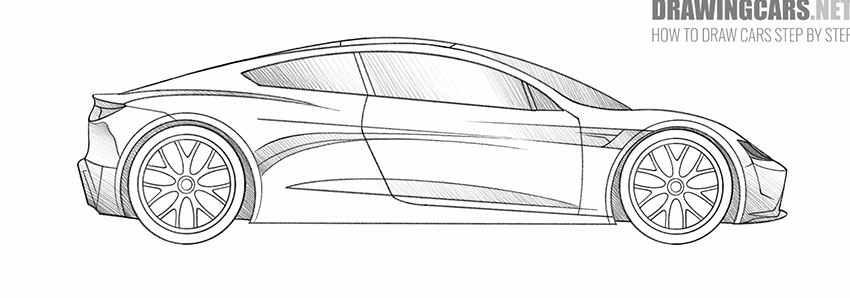
- Apply the hatching to the finished drawing.
Now you need to mark the darkened and bulging parts on the body of the car. To do this, add short thin strokes, as shown in the example.


Easier Tesla Roadster Drawing Techniques
So we’ve drawn a pretty good Tesla, haven’t we? But there are several more similar drawing lessons for you. Try creating two more variations of this beautiful car.
How to Draw an Old Tesla Roadster
We couldn’t pass by the very first Tesla model – that’s why we created a lesson on drawing an old Tesla. The first generation Tesla Roadster is a revolutionary electric sports car that combines aesthetics and performance. Tesla Motors’ first vehicle, the Roadster, introduced in 2008, set new standards for electric vehicles, proving that clean technology could be exciting and fast.

How to Draw a Tesla Roadster for Beginners
And this is another version of drawing Tesla for beginners. In this drawing lesson we abandoned complex shadows and some other details. This tutorial is perfect for you if you want to draw Tesla as easily and correctly as possible with a good result.

Conclusion
In this Tesla Roadster drawing tutorial, we delved into a world of innovation and creative inspiration. You have created your own unique interpretations of this remarkable electric sports car, bringing it to life on paper through your vision and talent. Remember that art and technology can go hand in hand, and your ability to express the beauty and power of your ideas through drawing is an incredible gift.
Tesla Roadster is not just a car, it is a symbol of innovation and aspiration for the future. May your art always be inspired by this spirit of innovation. Keep drawing, creating and exploring the world around you through the eyes of an artist. Thank you for your participation in this lesson.
Leave a Reply