
Today we will show you how to draw an Audi. With the help of this clear and fairly simple instruction, you will quickly draw this vehicle.

So, we are happy to offer you this wonderful guide on how to draw an Audi. This lesson will be as clear and fun as the other lessons presented on this site. To complete this lesson well, you need to be able to draw straight lines as well as circles. If you want your drawing to look more beautiful and neat, you can use a ruler and compass when necessary.
We hope that you were interested in learning some facts about this car model, and you are happy to start drawing. Now you can prepare the art supplies you need to start this tutorial.
Try to draw the same lines as shown in the example, take your time and constantly compare your drawing with our sample to achieve the best results. We wish you to easily cope with this work and enjoy the creative process.
Time needed: 1 hour
How to Draw an Audi
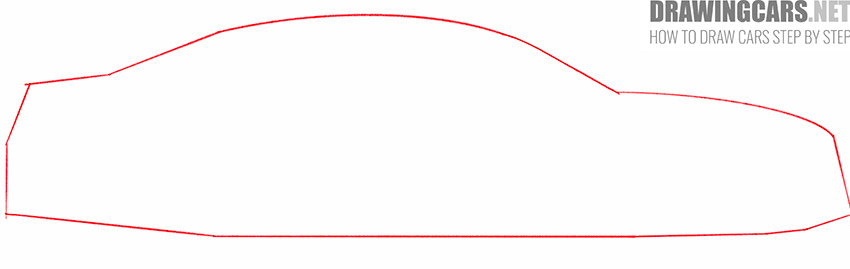
- Sketch the basic outline of the Audi.
For this step, you can sketch out the main outline of the car slightly casually, using straight and slightly curved lines.
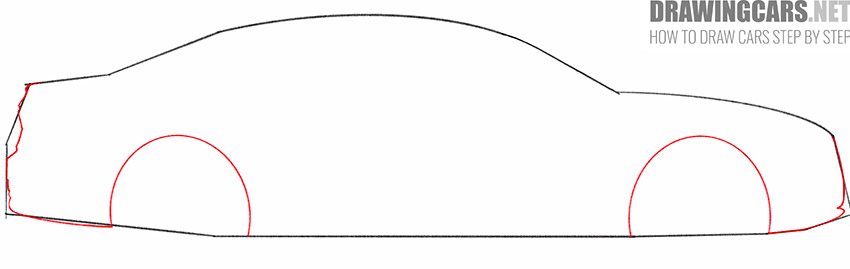
- Draw the front and rear of the Audi and add the arches.
Near the side lines of the previously applied markup, draw curved lines of different lengths, and also add two identical arcs at the bottom of the intended contour of the car.
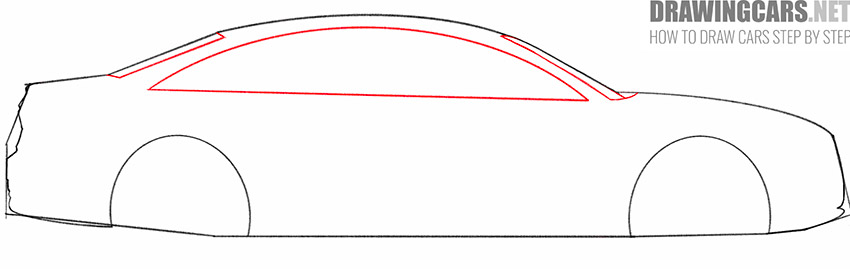
- Depict the Audi windows.
Draw the visible part of the front and rear windows using straight lines and one arc. Using a large arc and a straight line, draw the elongated and pointed side window.
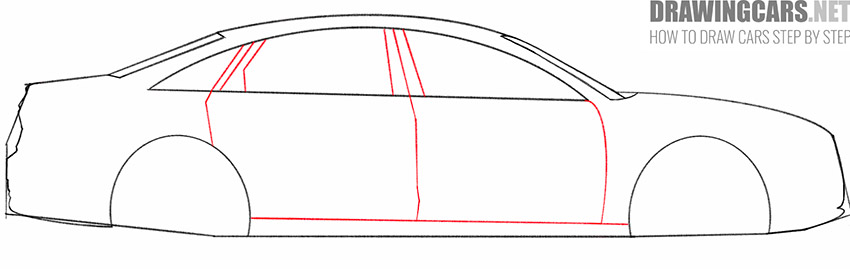
- Add the outlines of the doors and threshold of the car.
Add straight lines around the previously drawn window outlines, draw a curved line near the front of the car, and draw a straight horizontal line at the bottom of the car.
- Draw some more Audi elements.
Depict the side mirror, door handles, an element at the top of the car, as well as the inside of the car and the windows on the other side of the car.
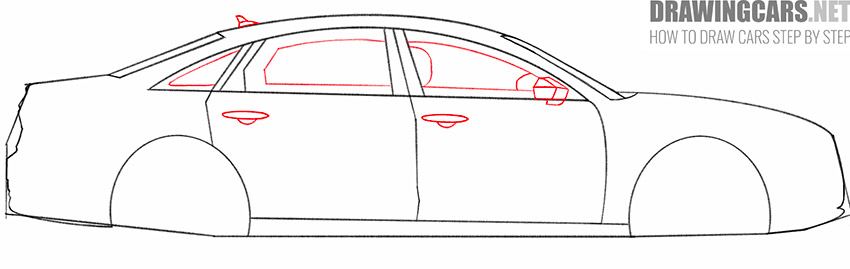
- Add the headlights, terrain lines and other elements in the front and rear of the car.
Draw straight and curved lines of varying lengths at the front and back of the car to add the headlights, grille, and contours of the bulges of the car.
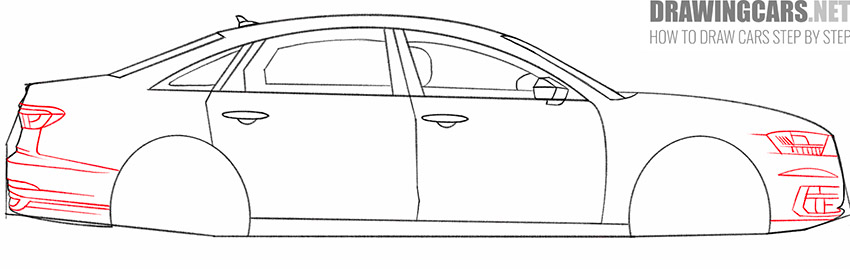
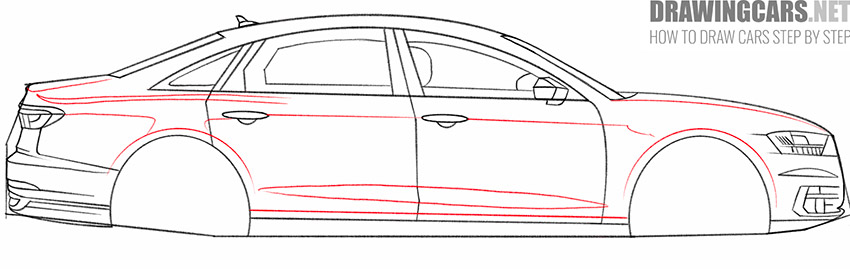
- Sketch out the bumps on the side of the Audi.
Now you should draw thin straight and curved lines of various lengths on the side of the car, and add arcs above the car’s arches.
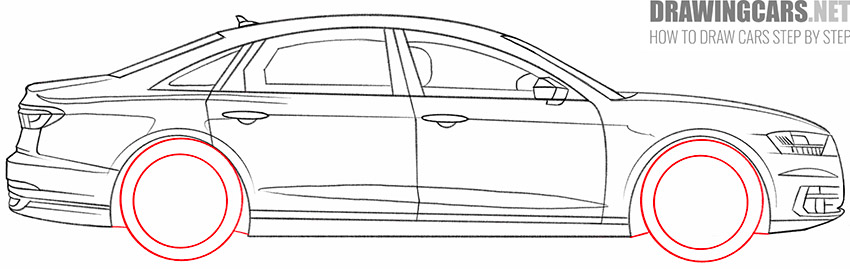
- Add the car wheels and erase extra lines.
Draw two symmetrical wheels using circles of different diameters, add short lines around them, and also erase unnecessary lines with the eraser.
- Finish drawing the Audi wheels.
Inside the previously drawn circles, add a few more circles of different diameters, as well as many identical shapes using straight lines.
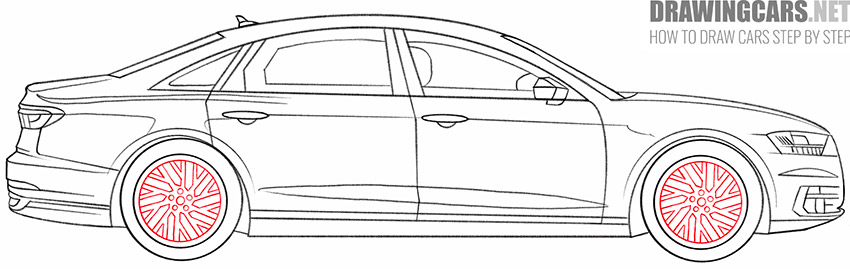
- Add the hatching.
At the last stage of drawing, add short dashed lines in order to indicate the dark areas and raised elements on the body of the car.
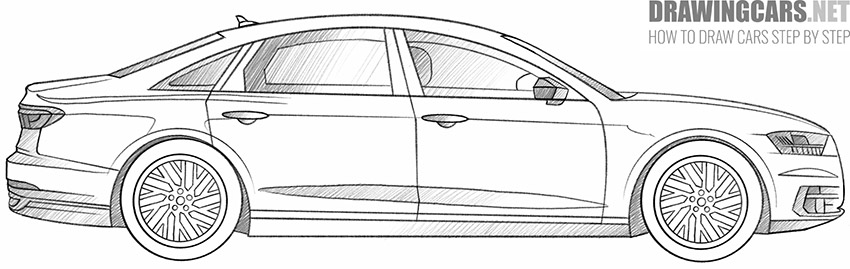


On this, another useful drawing lesson came to an end, and now you have learned how to draw an Audi step by step. In this lesson, you have acquired useful skills that you can use in your next drawings. Also on our site you will find many other useful and exciting lessons in drawing vehicles. If you liked this step-by-step guide, then share your impressions in the comments.
Leave a Reply