
In this drawing lesson we will tell you how to draw a Mercedes G-Class step by step. This guide will definitely help you.

How to Draw a Mercedes G-Class: Introduction
So, we are happy to bring to your attention this useful and fascinating drawing lesson in which we will tell and show you how to draw a Mercedes G-Class step by step. Each of you has probably seen cars of this type, and now you can learn how to draw it yourself.
To complete this drawing lesson, you need to be able to draw straight lines, circles, and also apply hatching. If you want your drawing to look nicer and neater, you can use a ruler and a compass when necessary.
Through expert tips, detailed instructions, and a touch of inspiration, you’ll learn the techniques needed to bring the Mercedes G-Class to life on paper. So, your gather drawing tools, clear your workspace, and get ready to immerse yourself in the world of precision, creativity, and artistic expression. Let’s transform your blank canvas into a masterpiece that pays homage to the enduring legacy of the Mercedes G-Class. Get ready to unleash your creativity and let your imagination drive you toward a truly exceptional drawing experience! Happy drawing!
Mercedes G-Class Drawing Tutorial
Time needed: 1 hour
How to Draw a Mercedes G-Class
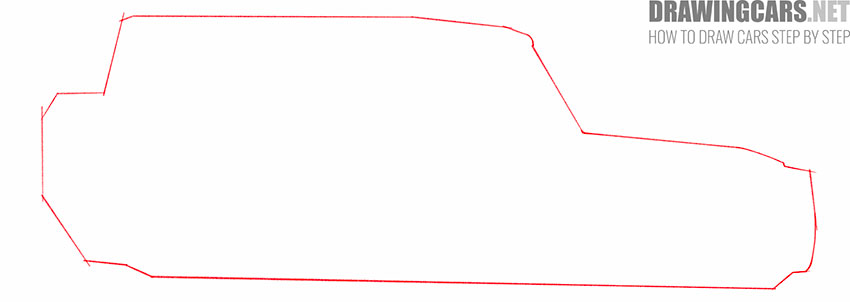
- Draw the main outline of the Mercedes G-Class.
Determine the size and position of your drawing and use straight and curved lines to draw the outer outline of the same shape as in our example.
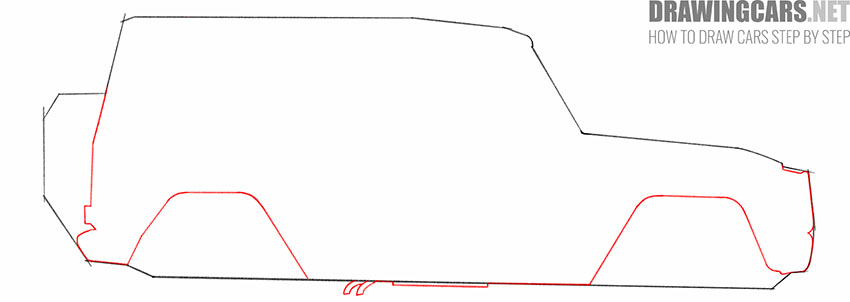
- Detail the bottom and front of the car.
Using curved lines to depict the front and back of the car. With two curved lines draw two wheel arches and draw a few lines between them.
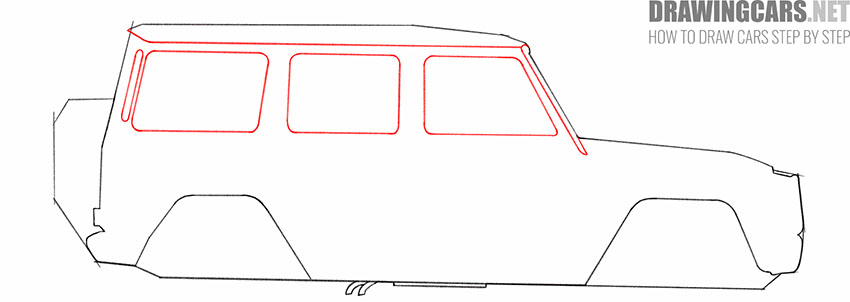
- Depict the windows and roof.
Draw the visible part of the front window, draw the side windows as well as the back windows. At the top of the car, draw a straight line, slightly curved at the end.
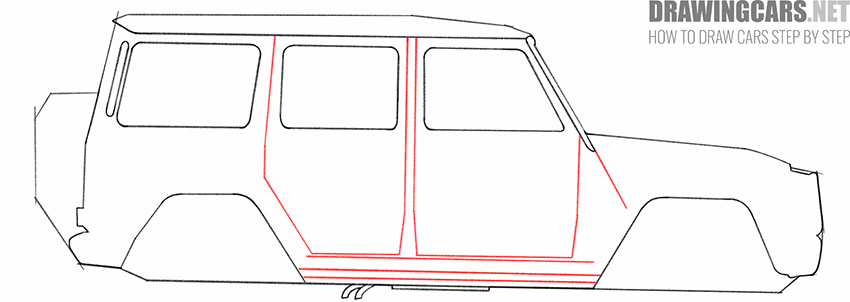
- Draw the doors and footboard of the car.
Using straight lines depict the front and back doors, which have different shapes. Draw the footboard at the bottom of the car using straight horizontal parallel lines.
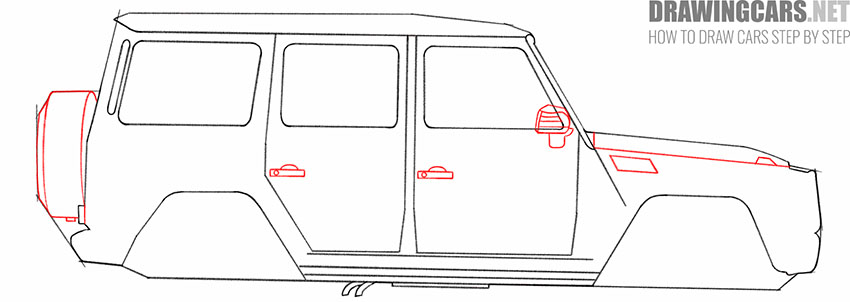
- Add details.
Draw the outlines of the side mirror, door handles, spare wheel housing and other elements. Now you should use many straight and curved lines of different lengths to add these necessary elements to the drawing.
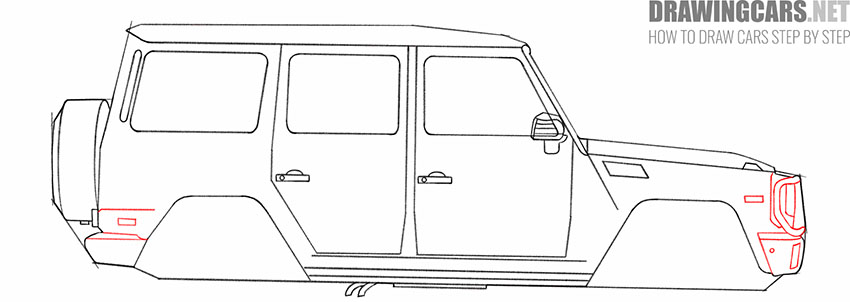
- Depict the headlights and other elements on the front and back of the car.
Headlights have a complex shape and consist of several elements of different shapes. Look carefully at the sample and try to correctly depict the shape of the front and rear lights and other elements.
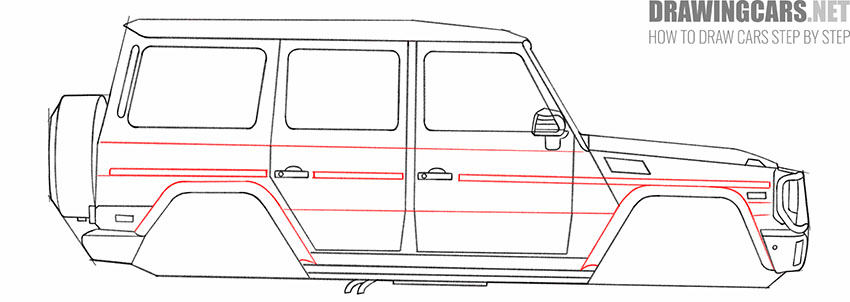
- Detail the body of the car.
Draw a few straight lines in order to mark the relief on the body of the car and give the drawing a more realistic look.
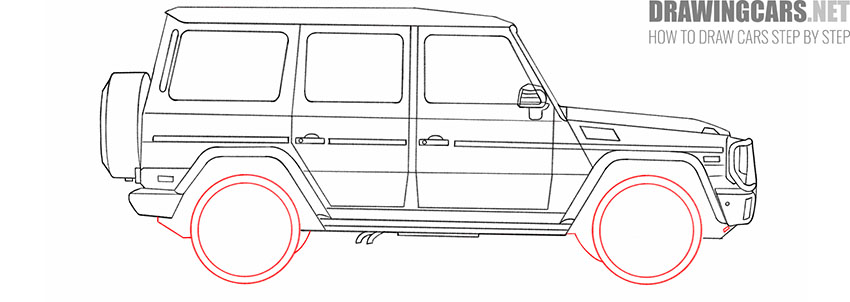
- Sketch out the wheels.
Depict several even circles to depict the inner and outer outline of the wheels. Add connecting lines from the wheels to the body of the car.
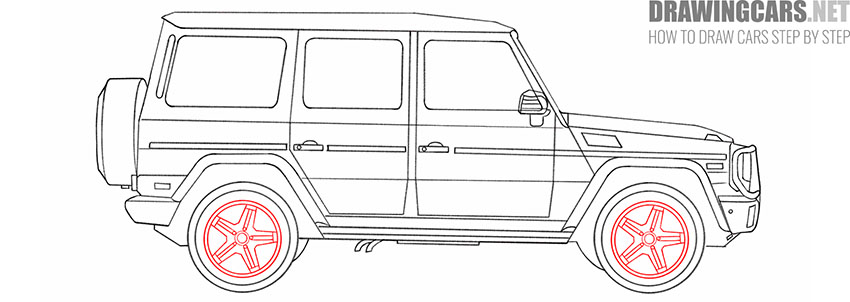
- Draw the rims.
In the center of each wheel, draw a few more circles and then draw straight and curved lines within them to indicate the curly elements on the rims.
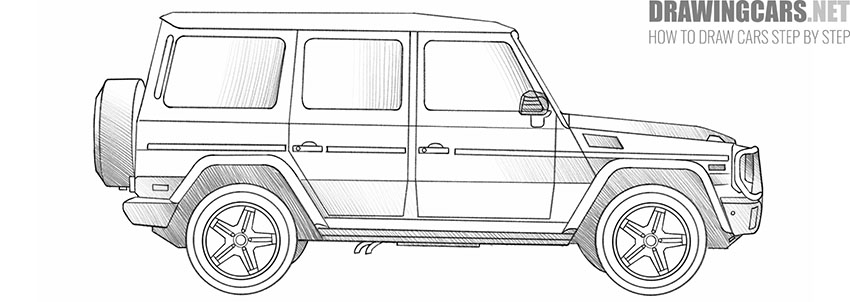
- Finish the drawing.
At the last stage of drawing, add the small neat hatching in order to highlight the dark areas and bulging parts on the body of the car.


Conclusion
This is the end of this simple drawing lesson with which you have learned how to draw a Mercedes G-Class step by step. I also recommend that you look at other drawing lessons on our website, with the help of which you will learn how to draw various drawings of an automotive theme, and also practice drawing various geometric shapes. We will be happy to read your comments to see if you succeeded in completing this drawing lesson. We will also be happy to take into account your wishes for new drawing lessons.
Leave a Reply