
Learn how to draw a vintage car in a fun drawing lesson and learn how to capture the beauty of vintage car details on paper.

Introduction
With the help of a simple instruction, we will show you how to draw a vintage car. Such a car does not have a stylish design, but it is quite convenient and practical. Drawing old car models is just as interesting as drawing modern cars. When you draw a vintage car, you can feel the atmosphere of yesteryear.
This lesson will be useful for you, because once again you will train your eye, learn how to maintain proportions in the drawing and make neat shading. Follow each step in this guide carefully for best results. The acquired skills will definitely come in handy when creating the following drawings if you want to draw any retro car.
At the beginning of drawing a vintage car, try to correctly build the shape of the car and take into account all the details so that the finished work looks holistic and realistic.
Vintage Car Drawing Tutorial
Time needed: 1 hour
How to Draw a Vintage Car
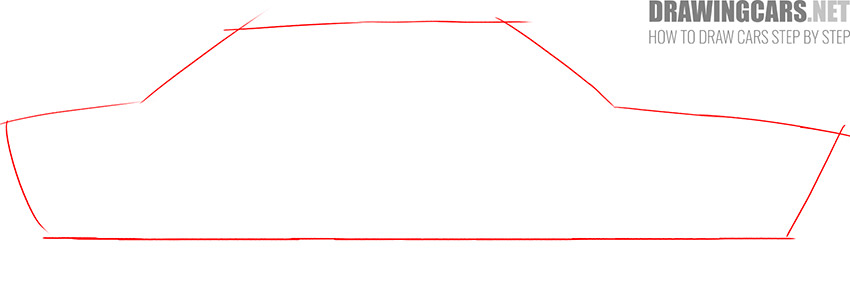
- Prepare the base of the vintage car.
As usual, at the beginning of the drawing, you must mark the outer contour of the car. Do this with thin lines that can be easily removed later.
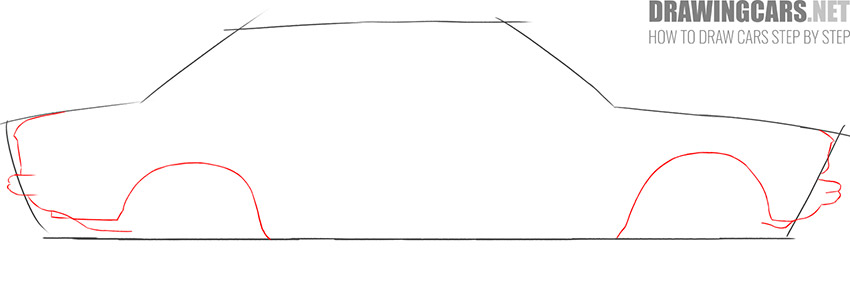
- Detail the bottom of the car.
Now take a close look at the sample and try to correctly depict all the protruding parts in the front and rear of the vintage car. Then add the wheel arches using semicircular lines.
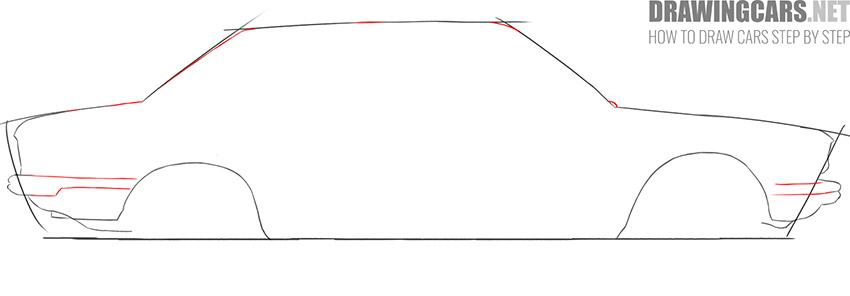
- Continue to give the vintage car the correct shape.
Now draw the top outline of the car using the lines you drew earlier. Using a few smooth lines, add elements to the bottom of the vintage car.
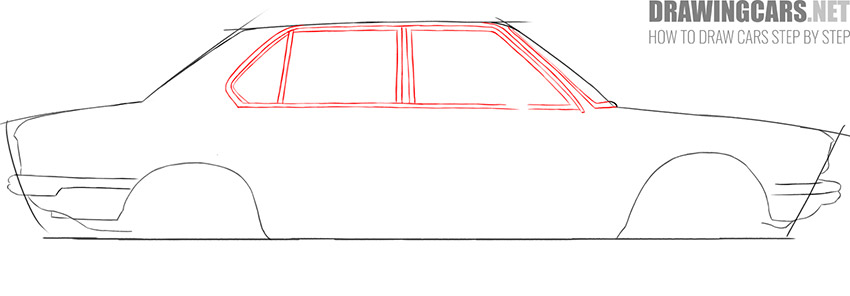
- Depict the windows.
Draw the visible part of the front window and draw the side windows. First draw the outer outline, then the inner one, and finally add the vertical dividing stripes.
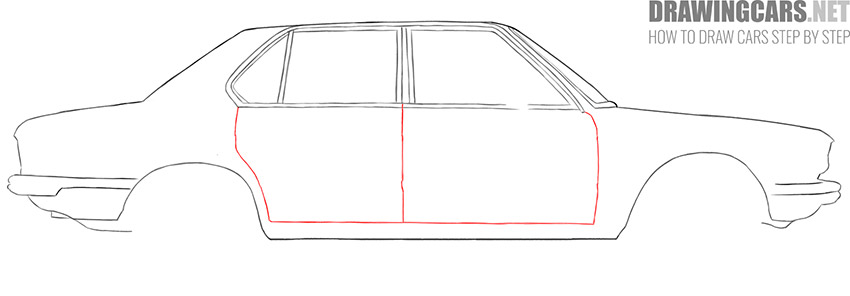
- Draw the door of the vintage car.
Using straight and curved lines, depict the front and back doors of the car. Draw all lines very carefully and keep proportions.
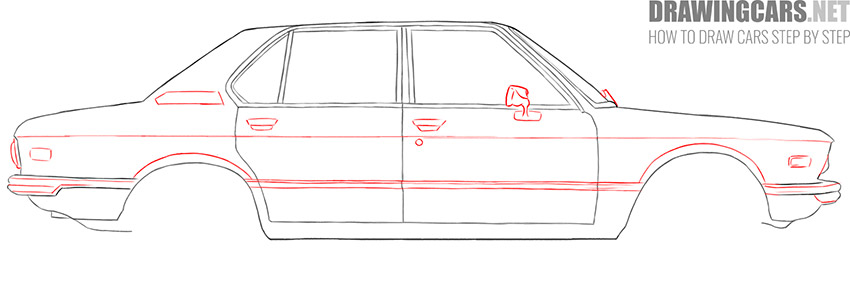
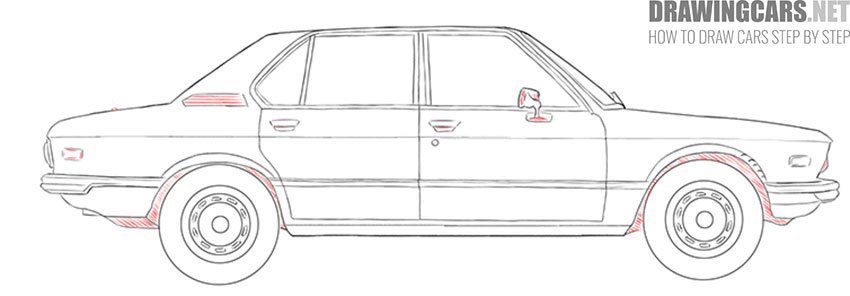
- Add small elements and detail the surface of the case.
Draw the side mirror, door handles, front and rear lights. On the body of the vintage car, draw horizontal lines to indicate the protruding parts.
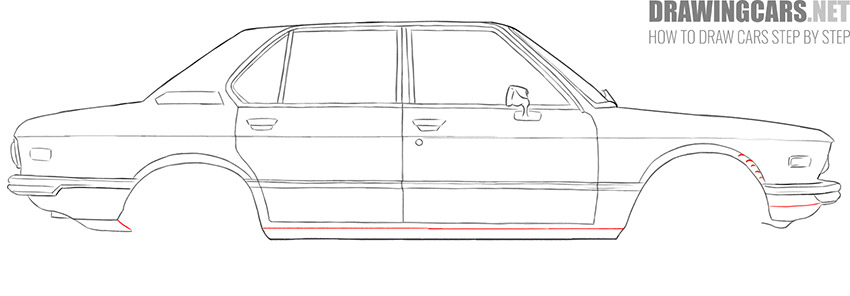
- Detail the body of the vintage car.
This is a very simple step in which you have to add a few elements. Draw a smooth horizontal line at the bottom and add short lines near the wheel arches.
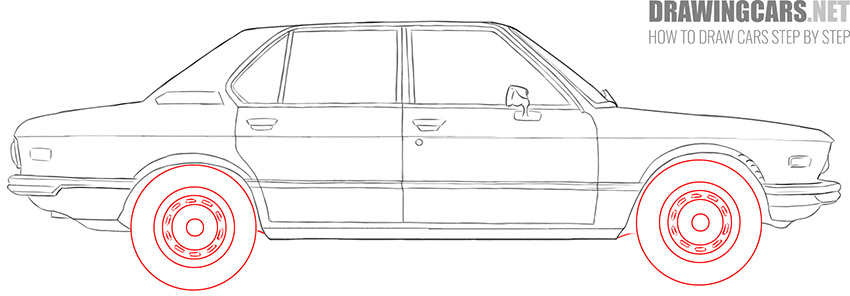
- Depict the wheels.
You have reached the most difficult stage of drawing. Now you have to draw two identical, two absolutely identical wheels. First draw the outer contour and then add the inner part.
- Add the hatching.
In this step, you have to select the dark areas and designate the volumetric details. To do this, use thin short lines.
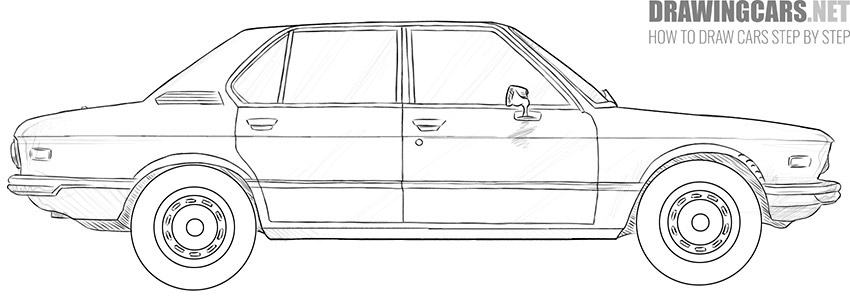
- Finish the vintage car drawing.
Finally, you have completed all the basic steps in this tutorial, and you can evaluate the result of your work. If everything is done correctly, then carefully circle your drawing along the contour.


An Additional Way to Draw a Classic Car
In the tutorial on how to draw a vintage car above, you may have seen a classic European car. But of course, other types of cars can be considered classic. For example, below we will show you how to draw a classic muscle car. By the way, you can visit our full lesson on drawing a classic muscle car.

How to Draw an Old Car Step-by-Step
Now let’s move on to classic full-size cars from the mid-20th century. In this picture you can see a large and majestic vintage car in the style of mafia films. Try to repeat all the steps as in our example and get a beautiful drawing of a vintage car like in my example.

How to Draw an Old Car
And here you can see a drawing of a vintage car as in the very first lesson. But unlike that tutorial, here we’ve done a little less detail to simplify the whole drawing process.

Conclusion
This vintage car drawing lesson gives you the opportunity to immerse yourself in the atmosphere of times gone by and learn how to capture the beauty and character of this unique vehicle on paper.
During the lesson, you learned the basics of proportions and perspective of a car, learn how to create volume and depth using light and shadow, and bring details to life, making them more realistic.
Learned how to use pencil and paper and various techniques to give your vintage car drawing a special expression. We hope that this vintage car drawing lesson gave you the opportunity to develop your skills and creativity in the art of drawing.
We hope that you have made every effort at each stage of drawing and are now admiring the result of your work. We recommend that you follow the other lessons presented on this site and draw a few more models of vintage cars. The more you practice, the better your drawings will look.
Leave a Reply