
In this lesson we will learn the technique of how to draw a a car from top. Drawing a car from this angle can be challenging, but with our step-by-step approach, you can successfully complete the task.

Introduction of the Car From the Top Drawing Tutorial
We are glad that you are interested in our drawing lessons and want to learn how to draw a car from different angles, in this tutorial you will learn how to draw a car from top. This instruction contains only five simple steps that even a novice artist can easily perform.
Drawing a car from above allows us to see all its details and proportions that are visible only from this point of view. We will pay attention to the shape of the body, roof, windows and other elements of the car.
Additionally, we will pay attention to shadows and lighting to create dimension and realism in our car drawings. We will also use various sketching techniques such as shading to add texture and depth.
This lesson will be useful for you, as you will once again practice drawing straight and curved lines and also train your spatial imagination, which will definitely come in handy in the future when creating new drawings.
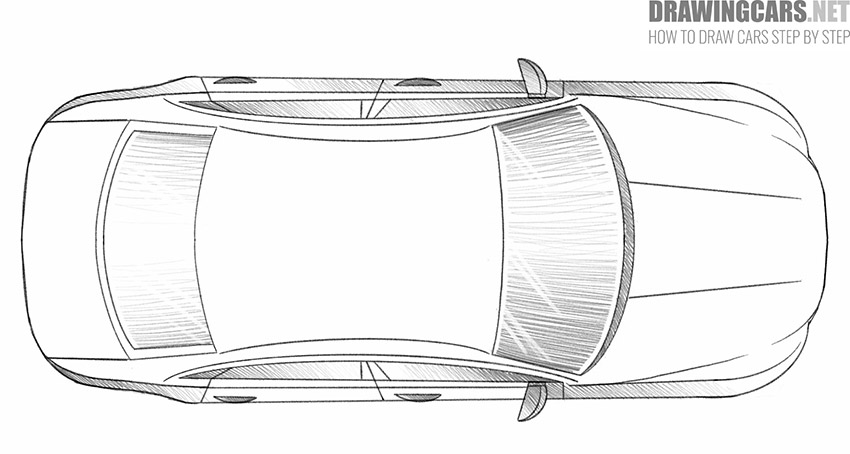
As an example, we have chosen a modern passenger car that has four doors from the Audi brand. The body of the car is medium and has a streamlined shape. A car of this model can often be seen on the roads. Your main task in this lesson is to remember the sequence of steps and carefully draw all the lines. During the lesson, make sure that both sides of the car are symmetrical.
I am sure this tutorial will help you develop your drawing skills and learn how to draw a car from top. Let’s start this fun tutorial and create some wonderful car drawings!
How to Draw a Car From Top Step-by-Step
Time needed: 1 hour
How to Draw a Car from Top
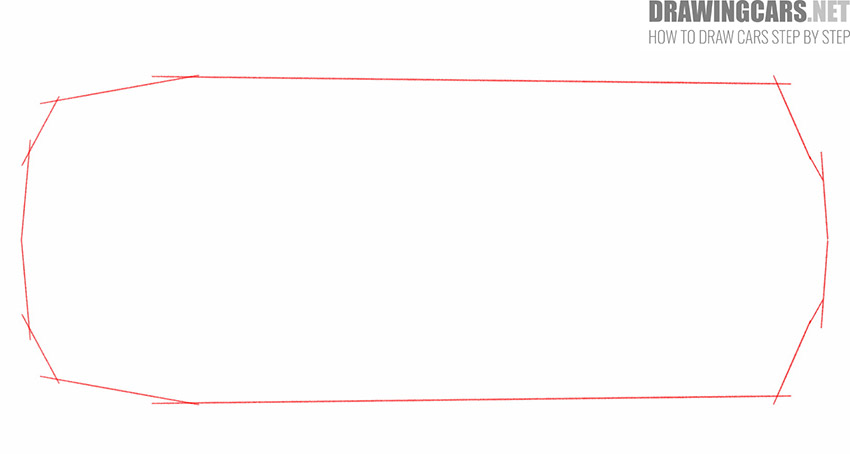
- Draw the main outline.
Start drawing by building baselines. Determine the size of your future drawing and use thin lines to depict the outer boundaries of the car.
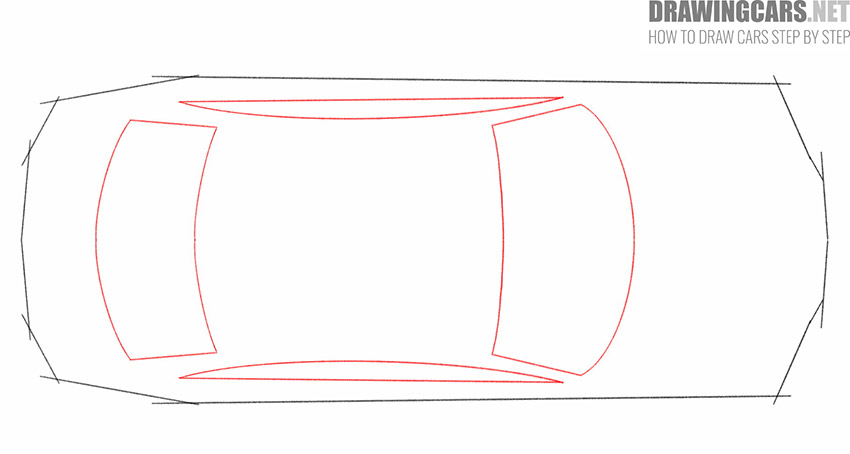
- Depict the windows.
Draw two side windows that are elongated. Using straight and curved lines draw the wide front window and the rear window.
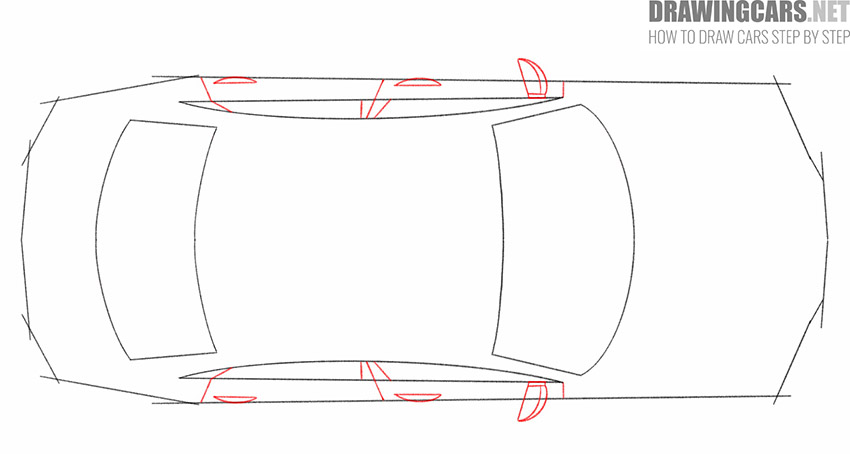
- Add small elements.
Draw two side mirrors, outline the doors, add handles on each door, and draw cross lines on the side windows to separate them into several sections.
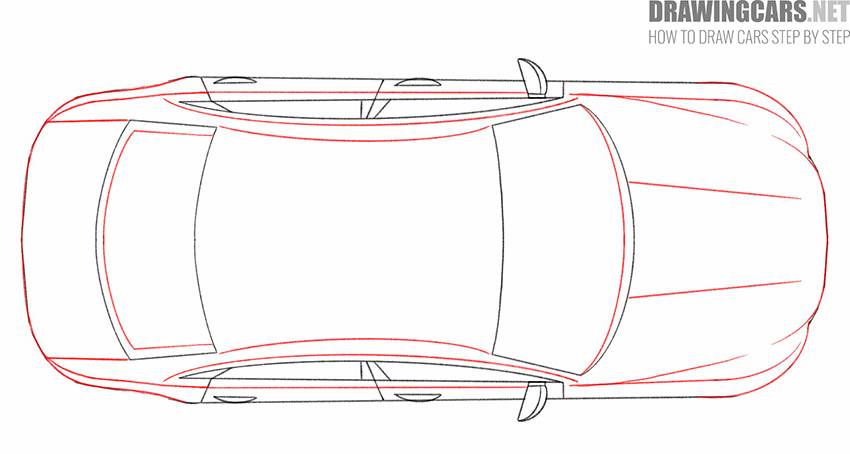
- Detail the body of the car.
Depict the volume and convex parts on the body of the car. To do this, draw straight and curved lines, as shown in our example.
- Finish the drawing.
The body of the car is ready, and it’s time to give your drawing a more realistic look. To do this, draw thin dashed lines to indicate dark areas and volumetric elements on the car body.


How to Draw a Car From Above for Beginners
This additional lesson of drawing a car from above will be much easier than the previous one. Simplicity is achieved primarily by the fact that we will not use complex shapes and shadows here.
If the lesson that you could see above was too difficult for you, then try to master this simple lesson of drawing a car from above.

Conclusion
Now you have mastered a new drawing lesson and learned how to draw a car from above. You have seen that it is very easy to do with our simple instructions. If this step-by-step guide was interesting and useful for you, then leave a little feedback in the comments. Also, you can offer your ideas for the next drawing lessons. When creating new instructions, we always take into account your wishes.
Leave a Reply